Drawing images consisting of all possible RGB colours!
Posted on Sat 22 November 2014 in fun
This is also an old, but fun project I did 8 months ago, inspired by the video that József Fejes posted on his blog in March: All RGB colors in one image. It was part of the challenge posted here, where people had to write code that makes colorful images. Fun, fun, fun!
The challenge has already finished when I saw it, but anyway, it sounded interesting and I wanted to see what I can come up with.
A bit about colours
There's a lot of colours out there! If you look into one pixel on your screen and concentrate really really hard, you will notice that it can (probably) display $16777216$ different colours! Here we are talking about $24$-bit colours, where each one is represented as a combination of red ($8$ bits), green ($8$ bits) and blue ($8$ bits) colours. $8$ bits can take $256$ different values, so $256 \times 256 \times 256 = 16777216$. And that's a lot! If you wore a different coloured shirt every minute, it would take you almost $32$ years to wear all of the possible $24$-bit RGB colours. I know you wanted to know that.
The result was colorful!
Below you can see what I got in the end.

In this case the image was $640\times480px$, which means it only contained $307200$ different colours, that is, only around $1.831054687\%$ of all possible $24$-bit RGB colours. OHNOES!
Make it bigger!
The next generated image was a bit bigger. It was $1088\times1920px$ big, containing $2088960$ different colours, which is around $12.451171875\%$ of all the colours we wanted to use.
Click to see it bigger!

That's better. Why $1088$ you ask? Because the implementation was a quick hack and required the dimensions to be divisible by $16$. That's what you get when you want to see the results as quickly as possible. But you know what's cool? Each colour in that image is used only once and it would take you almost $4$ years to wear shirts in all of those colours if you wore each one only for a minute!
A video would be even more colorful!
The next obvious thing that needed to be done was a video of how this image was generated. Here are four frames from the first image shown in this post being generated:
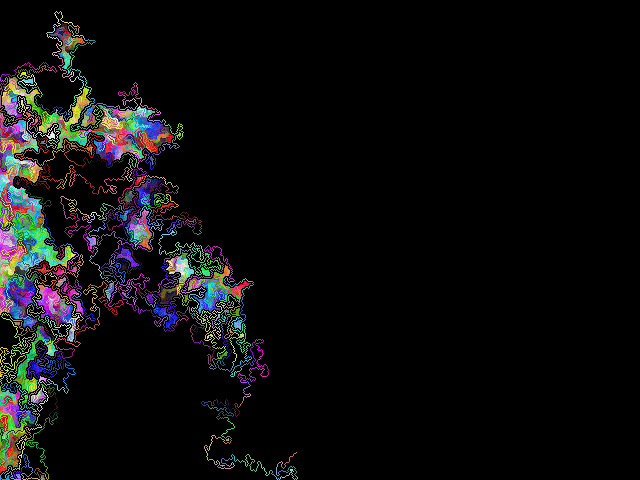
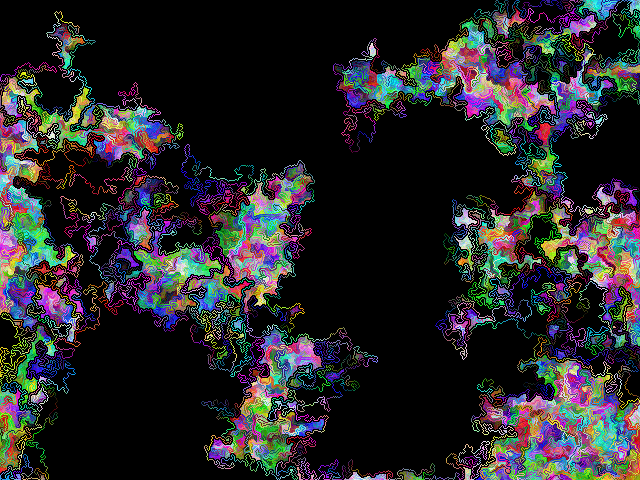
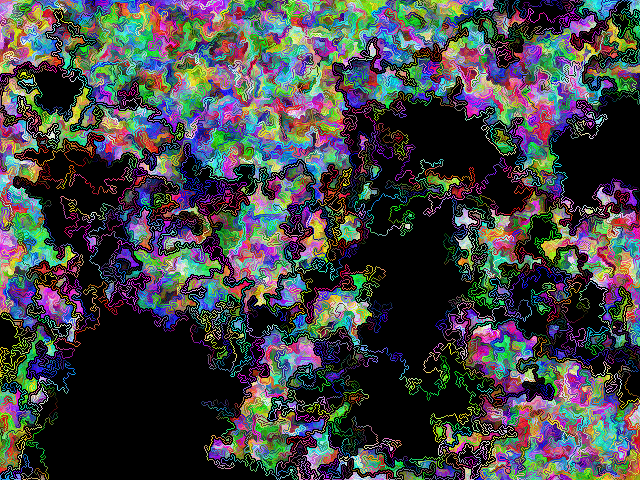
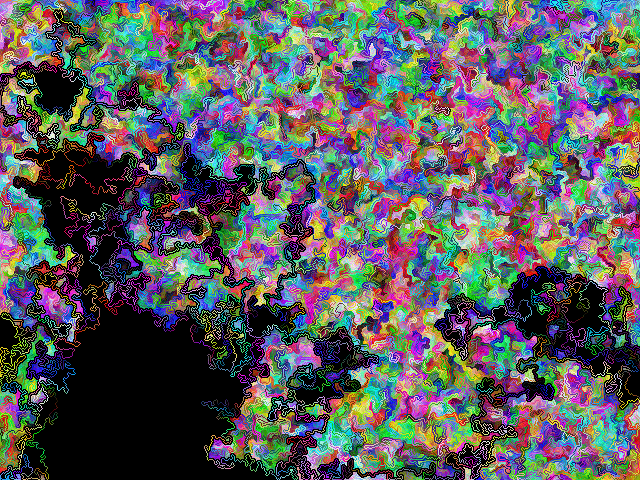
Having limited time, I decided that $12.451171875$ is roughly equal to $100$ and that a HD video will be enough to call this project done. So, a frame was saved after generating every so many pixels of the $1088\times1090px$ image, the frames were turned into a video and it was uploaded to YouTube to live there happily ever after.
The end?
Enter savfk!
It wasn't the end! After uploading the video on YouTube, my colleague Saverio messaged me and said:
I did a 2:30 thingy on purpose for your colour stuff!
Turns out he makes music (which I didn't know) and he made real music for the crazy colour snake video!! The music fit perfectly and the result can be seen below.
Now the project was finally complete! Yay!
If you want to see other videos of the images being generated, here's a few (but without music): a small one, the 640x480px version, the 3 and a half hour long version and the
But, but, all of the colours??
Yes, it will work with all of the colours if you have the time to generate the frames. That's why I'm providing the code below!
Code
It's written in python and is again not cleaned up because I'm too lazy to do that. If you want to use it to generate an image really using all of the colours, the dimensions of it should be for example $4096\times4096px$. Just set the height and width variables to $256$, and that should work. It could also not work, I don't know, this was written a long time ago. :P
And I forgot to mention how it actually works! For the traversing part, it is just a randomized DFS algorithm. Every time when a pixel get visited, a colour is chosen randomly and it is used if it is less than a certain distance (Euclidean distance in RGB space) from the previously used colour. If it isn't, another colour gets chosen randomly. If after a number of random choices the colour still isn't less than the threshold distance from the previous colour, then the threshold gets increased. And that's it! Magic!
Oh, and BTW, you should have a folder called generated where all the
images will get saved to.
import cv2
import numpy as np
import math
import random
from sets import Set

dr = [-1, -1, -1, 0, 0, 1, 1, 1]
dc = [-1, 0, 1, -1, 1, -1, 0, 1]

height = 68 #1080/16
width = 120 #1920/16

field = np.zeros((height * 16, width * 16, 3), dtype = "uint8")
visited = np.zeros((height * 16, width * 16), dtype = "bool")

total_colours = 0
colours = []

def distance(c1, c2):
    return math.sqrt((c1[0] - c2[0]) * (c1[0] - c2[0]) +
                     (c1[1] - c2[1]) * (c1[1] - c2[1]) +
                     (c1[2] - c2[2]) * (c1[2] - c2[2]))


def fill(queue, prev_colour):

    while (len(queue) > 0):

        current_point = queue.pop(0)

        rand_it =  list(range(len(dr)))
        random.shuffle(rand_it)

        for i in xrange(len(dr)):
            r = current_point[0] + dr[rand_it[i]]
            c = current_point[1] + dc[rand_it[i]]

            if (r < 0 or r >= field.shape[0]):
                continue

            if (c < 0 or c >= field.shape[1]):
                continue

            if (visited[r, c]):
                continue

            if ((r,c) in queue):
                continue

            queue.insert(0, (r, c))

        r = current_point[0]
        c = current_point[1]

        field[r, c, 0] = prev_colour[0]
        field[r, c, 1] = prev_colour[1]
        field[r, c, 2] = prev_colour[2]

        visited[r, c] = True

        print len(colours)

        colours.remove(prev_colour)
        if (len(colours) > 0):
            next_colour = colours[random.randint(0, len(colours) - 1)]

            tries = 0

            min_dist = 30

            while (distance(prev_colour, next_colour) > min_dist):
                next_colour = colours[random.randint(0, len(colours) - 1)]
                tries += 1

                if (tries > 0.1 * len(colours)):
                    min_dist += 0.1

            prev_colour = next_colour

        cv2.imwrite("generated/img_" + str((total_colours - len(colours))).zfill(10) + ".png", field)

cv2.namedWindow("field", flags = cv2.cv.CV_WINDOW_NORMAL)

for r in xrange(16):
    for c in xrange(16):
        for i in xrange(height):
            for j in xrange(width):
                colours.append((int((float(r * 16 + c) / 256) * 255),
                                int((float(i) / height) * 255),
                                int((float(j) / width) * 255)))


    print r, "/", 16

total_colours = len(colours)

prev_colour = colours[random.randint(0, len(colours))]

current_point = (random.randint(0, field.shape[0]),
                 random.randint(0, field.shape[1]))

queue = []

queue.append(current_point)

fill(queue, prev_colour)

cv2.imshow("field", field)
cv2.waitKey(0)
The code is also available on github.
Thanks for scrolling through!